LociOiling (talk | contribs) (Revised puzzle 4-3.) Tag: rte-source |
LociOiling (talk | contribs) m (Better still...) |
||
| (47 intermediate revisions by 2 users not shown) | |||
| Line 1: | Line 1: | ||
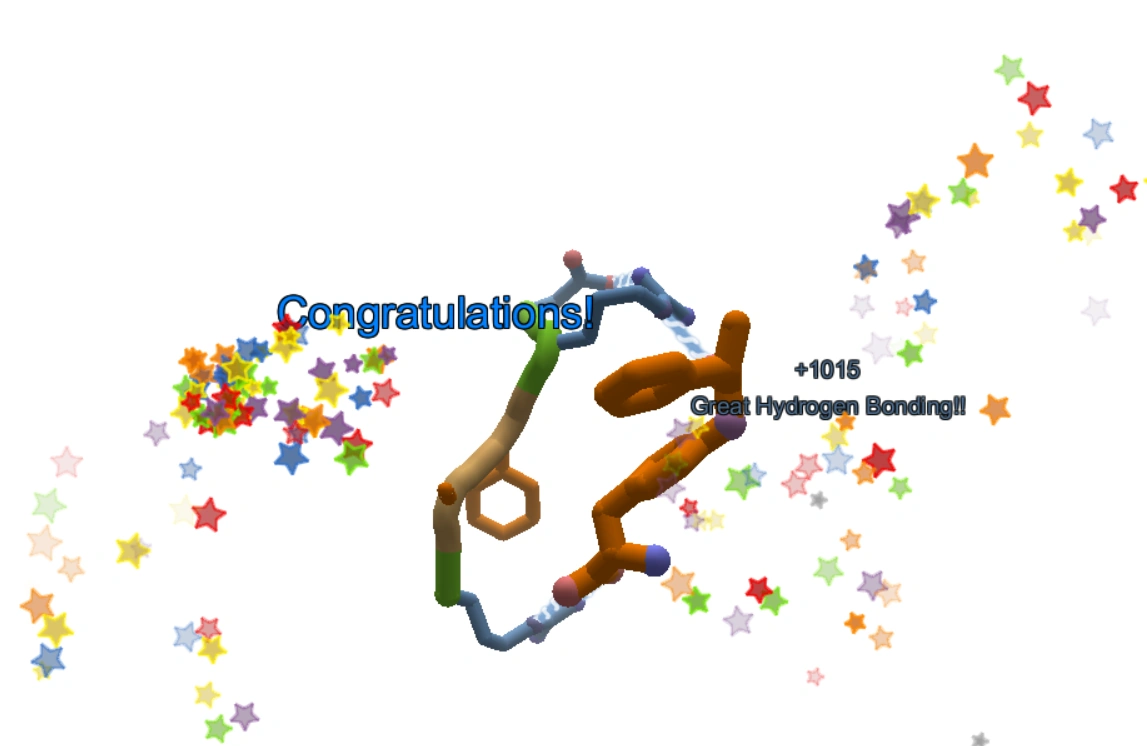
[[File:Intro_Success.png|thumb|400px|Success!]] |
[[File:Intro_Success.png|thumb|400px|Success!]] |
||
| − | + | [[Intro Puzzles]] show you how to play Foldit. This special campaign level shows you how to use many of the tools, and explains some of the key ideas, like [[Clashes]], [[Voids]], and [[Exposeds]]. |
|
| + | Try to complete each puzzle without help first. Most of the puzzles should take only a couple of minutes. If you get stuck, use "Reset Puzzle" from the Actions menu in the lower left and try again. |
||
| − | You'll find tips for each of intro puzzles below. There's also a link to a video for each puzzle, provided by Foldit player [http://fold.it/portal/user/42629 Madde]. |
||
| + | '''New:''' the video [https://www.youtube.com/watch?v=bIc-FoHLtjY QUICK Foldit Tutorial Walkthrough] from S0ckrates shows you how to be the boss of the intro puzzles. |
||
| − | Try to complete each puzzle without help first. The first few puzzles should be very easy, but none of the puzzles should take more than a couple of minutes. If you get stuck, you can reset the puzzle using "Reset Puzzle" from "Actions" in the lower left or the by the keyboard shortcut ctrl-r. |
||
| + | |||
| + | [[Intro Puzzles/Tips|Intro Puzzle Tips]] covers some common questions like how to [[Band|band]] and [[Freeze|freeze]]. It also gives some keyboard shortcuts for view options that may help you see what's going on. |
||
| + | |||
| + | If you're having problems, you'll find tips below. Just click on the icon for the puzzle you're stuck on. There are tips and techniques for each puzzle. Each puzzle also YouTube videos provided by Foldit players [http://fold.it/portal/user/42629 Madde] and [https://fold.it/portal/user/476462 Loci]. |
||
| + | |||
| + | A few puzzles, such as [[Intro Puzzles/Remix|Remix]], [[Intro Puzzles/Electron Density|Electron Density]], and [[Intro Puzzles/Hydrophobic Disaster|Hydrophobic Disaster]], may require more time. These intro puzzles are closer to real Foldit puzzles. |
||
If you have additional questions, ask online in the Foldit client using "Chat - Global", or "Chat - Group". See [[IRC Chat|Foldit chat]] for more on Foldit chat. |
If you have additional questions, ask online in the Foldit client using "Chat - Global", or "Chat - Group". See [[IRC Chat|Foldit chat]] for more on Foldit chat. |
||
| − | |||
The following translations of this page are available: |
The following translations of this page are available: |
||
[[Tutorial Puzzles (deutsch) | Deutsch]] | |
[[Tutorial Puzzles (deutsch) | Deutsch]] | |
||
[[Tutorial Puzzles (svenska) | Svenska]] | [http://es.foldit.wikia.com/wiki/Acertijos_de_Introducci%C3%B3n Español] | [http://de.foldit.wikia.com/wiki/Einf%C3%BChrungspuzzle German] | [http://ru.wikiversity.org/wiki/FoldIt_Wiki/%D0%A3%D1%87%D0%B5%D0%B1%D0%BD%D1%8B%D0%B5_%D0%B3%D0%BE%D0%BB%D0%BE%D0%B2%D0%BE%D0%BB%D0%BE%D0%BC%D0%BA%D0%B8 Russian] |
[[Tutorial Puzzles (svenska) | Svenska]] | [http://es.foldit.wikia.com/wiki/Acertijos_de_Introducci%C3%B3n Español] | [http://de.foldit.wikia.com/wiki/Einf%C3%BChrungspuzzle German] | [http://ru.wikiversity.org/wiki/FoldIt_Wiki/%D0%A3%D1%87%D0%B5%D0%B1%D0%BD%D1%8B%D0%B5_%D0%B3%D0%BE%D0%BB%D0%BE%D0%B2%D0%BE%D0%BB%D0%BE%D0%BC%D0%BA%D0%B8 Russian] |
||
[http://ja.foldit.wikia.com/wiki/Tutorial_Puzzles | Japanese]. |
[http://ja.foldit.wikia.com/wiki/Tutorial_Puzzles | Japanese]. |
||
| + | __NOEDITSECTION__ |
||
| + | Intro puzzles are organized into levels. Click on the icons below for more information about each intro puzzle. The [[Intro Puzzles/Master List|Intro Puzzle Master List]] has the same information in a simplified format. |
||
| − | == |
+ | ==Sidechains== |
| + | The puzzles in the Sidechains level introduce [[Sidechain|sidechains]] and demonstrate ways to fix [[Clashes|clashes]]. The [[Shake Sidechains|shake]] tool makes its debut. |
||
| − | [[File:Level_1_Sidechains.png|thumb|400px|Level 1 Sidechains intro puzzles.]] |
||
| − | The Level 1 puzzles introduce [[Sidechain|sidechains]] and demonstrate ways to fix [[Clashes|clashes]]. The puzzles also show how to move the protein around, and include an example of using one of the built-in [[Tools|tools]] to fix a problem. |
||
<br clear="all"/> |
<br clear="all"/> |
||
| + | <gallery widths="120" spacing="small" captionsize="small" captionalign="center" navigation="true" hideaddbutton="true"> |
||
| − | ==='''One Small Clash'''=== |
||
| + | One_Small_Clash_(icon).png|One Small Clash|link=Intro_Puzzles/One_Small_Clash |
||
| − | [[File:Level_1-1_One_Small_Clash.png|thumb|400px|One Small Clash. Move one of the sidechains to clear the clash.]] |
||
| + | Swing_It_Around.png|Swing It Around|link=Intro_Puzzles/Swing_It_Around |
||
| − | In this puzzle, a small piece of [[Protein|protein]] has two [[Sidechain|sidechains]]. A spiky red ball shows that the sidechains are [[Clashes|clashing]]. |
||
| + | Shake!.png|Shake!|link=Intro_Puzzles/Shake! |
||
| + | </gallery> |
||
| + | ==Backbone Packing== |
||
| + | The Backbone Packing level introduces the [[Backbone|backbone]], the part which holds the protein together. The sidechains are attached to the backbone. |
||
| + | This level demonstrates how to fix [[Voids|voids]]. The [[Wiggle|wiggle]] tool is added to the mix. Wiggle and [[Shake Sidechains|shake]] are the most important tools in Foldit. |
||
| − | You can drag the sidechains with the mouse. |
||
| − | |||
| − | Get rid of the clash by clicking and dragging one of the sidechains away from the other. |
||
| − | |||
| − | Technical stuff: this puzzle has only three [[Segment|segments]]. The orange [[Hydrophobic|hydrophobic]] sidechain on the left is [[Tyrosine|tyrosine]]. The blue [[Hydrophilic|hydrophilic]] sidechain on right is either [[Glutamic acid|glutamate]] or [[Glutamine|glutamine]], which have the same shape. There's a segment in between the two sidechains, which is [[Glycine|glycine]]. Glycine has no sidechain. |
||
| − | |||
| − | [http://www.youtube.com/watch?v=UGQ-UQovSZs Madde's "One Small Clash" video] |
||
<br clear="all"/> |
<br clear="all"/> |
||
| + | <gallery widths="120" spacing="small" captionsize="small" captionalign="center" navigation="true" hideaddbutton="true"> |
||
| + | Backbones_Collide.png|Backbones Collide|link=Intro_Puzzles/Backbones_Collide |
||
| + | Close_the_Gap.png|Close the Gap|link=Intro_Puzzles/Close_the_Gap |
||
| + | Wiggle!.png|Wiggle!|link=Intro_Puzzles/Wiggle! |
||
| + | </gallery> |
||
| + | ==Hydrogen Bonding== |
||
| + | The Hydrogen Bonding level introduces [[Hydrogen bond|hydrogen bonds]], which help hold proteins together. Hydrogen bonds show as blue-and-white "candy canes" in Foldit. |
||
| + | This level includes techniques for lining up [[Sheet|sheets]] that are used all the time by Foldit players. It adds [[Band|bands]], which are important for moving sheets and other parts of the protein. |
||
| − | ==='''Swing It Around'''=== |
||
| − | [[File:Level_1-2_Swing_It_Around.png|thumb|400px|Swing It Around. Rotate the protein, then move the sidechains on the end away from each other to solve the puzzle.]] |
||
| − | This puzzle starts with the sidechains facing away from you. |
||
| − | |||
| − | The first step is to click and drag on the white background to rotate the protein so you can see and grab the [[Sidechain|sidechains]]. |
||
| − | |||
| − | Once you can see the sidechains, drag the sidechains on each end away from each other to clear the [[Clashes|clashes]] and solve the puzzle. |
||
| − | |||
| − | Technical stuff: this puzzle has five [[Segment|segments]]. The sidechains are all [[Hydrophilic|hydrophilic]]. The big sidechain on the left is [[Lysine|lysine]], and the big sidechain on the right is [[Arginine|arginine]]. The sidechain in the middle is [[Threonine|threonine]]. Threonine has the same shape as [[Valine|valine]], but valine is [[Hydrophobic|hydrophobic]], so it would be orange. In between the segments withsidechains, there are two [[Segment|segments]] of [[Glycine|glycine]]. |
||
| − | |||
| − | [http://www.youtube.com/watch?v=Pb6Dtns41jM Madde's "Swing It Around" video] |
||
<br clear="all"/> |
<br clear="all"/> |
||
| + | <gallery widths="120" spacing="small" captionsize="small" captionalign="center" navigation="true" hideaddbutton="true"> |
||
| − | |||
| + | Sheets_Together.png|Sheets Together|link=Intro_Puzzles/Sheets_Together |
||
| − | ==='''Shake!'''=== |
||
| + | Lonely_Sheets.png|Lonely Sheets|link=Intro_Puzzles/Lonely_Sheets |
||
| − | [[File:Level_1-3_Shake.png|thumb|400px|Shake! Click the shake tool to clear the clashes. Click one of the stop buttons to finish.]] |
||
| + | Lock_and_Lower.png|Lock and Lower|link=Intro_Puzzles/Lock_and_Lower |
||
| − | Like the first two puzzles, there are [[Clashes|clashes]] between [[Sidechain|sidechains]] when this one starts. This puzzle introduces the [[Shake Sidechains|shake]] tool. Shake automatically moves all the sidechains, trying to find a better position. |
||
| + | Sheets_and_Ladders.png|Sheets and Ladders|link=Intro_Puzzles/Sheets_and_Ladders |
||
| − | |||
| + | Hide_the_Hydrophobic.png|Hide the Hydrophobic|link=Intro_Puzzles/Hide_the_Hydrophobic |
||
| − | To solve the puzzle, click on the shake button in the lower left of the window. The [[Clashes|clashes]] should clear. Click on one of the stop button to finish the puzzle. |
||
| + | Hydrophobic_Disaster.png|Hydrophobic Disaster|link=Intro_Puzzles/Hydrophobic_Disaster |
||
| − | |||
| + | </gallery> |
||
| − | Technical stuff: this puzzle shows two [[Helix|helices]] (or maybe "helixes"). The two helices are connected by a section of [[Loop|loop]]. The two previous puzzles had only [[Sheet|sheets]]. More on helices, sheets, and loops later. |
||
| + | ==Hydrophobics and Hydrophilics== |
||
| − | |||
| + | This level discusses [[Hydrophobic|hydrophobics]] and [[Hydrophilic|hydrophilics]] in more detail. Orange sidechains are hydrophobic, and should be hidden on the inside of the protein. Blue sidechains are hydrophilic, and are OK on the outside of the protein. |
||
| − | [http://www.youtube.com/watch?v=W8VFYoIz8DM Madde's "Shake!" video] |
||
| + | <gallery widths="120" spacing="small" captionsize="small" captionalign="center" navigation="true" hideaddbutton="true"> |
||
| − | <br clear="all"/> |
||
| + | Control_Over_Clashing.png|Control Over Clashing|link=Intro_Puzzles/Control_Over_Clashing |
||
| − | |||
| + | Turn_It_Down.png|Turn It Down|link=Intro_Puzzles/Turn_It_Down |
||
| − | == Backbone packing == |
||
| + | Flippin'_Sheets.png|Flippin' Sheets|link=Intro_Puzzles/Flippin'_Sheets |
||
| − | [[File:Level_2_Backbone_Packing.png|thumb|400px|Level 2 Backbone Packing intro puzzles.]] |
||
| + | The_Right_Rotation.png|The Right Rotation|link=Intro_Puzzles/The_Right_Rotation |
||
| − | Level 2 introduces the [[Backbone|backbone]], the part which holds the protein together. The sidechains are attached to the backbone. |
||
| + | </gallery> |
||
| − | |||
| + | ==Tools and Types== |
||
| − | This level also introduces [[Voids|voids]], which happen when there are empty spaces in the protein. In some ways, voids are the opposite of clashes. |
||
| + | The Tools and Types level introduces some of the different [[101_-_Puzzle_Levels_and_Types|puzzle types]] found in Foldit. The move tool is added. |
||
| − | |||
| − | Finally, in this level [[Wiggle|wiggle]] tool becomes available. Wiggle and [[Shake Sidechains|shake]] are the most basic tools in Foldit. |
||
| − | <br clear="all"/> |
||
| − | |||
| − | ==='''Backbones Collide'''=== |
||
| − | [[File:Level_2-1_Backbones_Collide.png|thumb|400px|Backbones collide. Pulling on either end of the backbone should clear the clash. Shaking alone won't do it.]] |
||
| − | Like the earlier puzzles, the goal of this puzzle is to clear a [[Clashes|clash]]. |
||
| − | |||
| − | The [[Shake Sidechains|shake]] tool is still available. Shaking helps the score, but it doesn't clear the clash. |
||
| − | |||
| − | To fix this clash, grab the [[Backbone|backbone]] of the protein at one of the ends, and drag it away from the backbone on the other end. |
||
| − | |||
| − | Technical stuff: this protein looks at lot like the one in the previous puzzle, "Shake!". Dragging on the ends of one of the two [[Helix|helixes]] in this puzzle is the key. |
||
| − | |||
| − | [http://www.youtube.com/watch?v=7YEearAtpLU Madde's "Backbones Collide" video] |
||
| − | <br clear="all"/> |
||
| − | |||
| − | ==='''Close the Gap'''=== |
||
| − | [[File:Level_2-2_Close_the_Gap.png|thumb|400px|Close the Gap. There are red voids in the middle. Pulling the ends toward each other tends to make the voids smaller. Shaking may help. Worst case, reset the puzzle and try again.]] |
||
| − | This puzzle starts with several [[Voids|voids]] in the middle of the protein. Voids appear as translucent red spheres. |
||
| − | |||
| − | The idea is to drag the ends of the protein toward each other. This puzzle can be a little tricky compared to the earlier ones. If you drag the ends too close together, you'll see the voids turn into [[Clashes|clashes]]. Using the shake tool may help clear the clashes, but you may need to reset and try again a few times. |
||
| − | |||
| − | You don't need to totally eliminate the voids, but they should be much smaller. Using shake at the end may help finish the puzzle. |
||
| − | |||
| − | The two curly [[Helix|helixes]] should be parallel to each other when you're done. |
||
| − | |||
| − | Technical stuff: voids happen when a protein is not "tightly packed" enough. They're bad because water could get into the empty space, which would tend to break the protein apart. |
||
| − | |||
| − | [http://www.youtube.com/watch?v=ksp6zUAME3s Madde's "Close the Gap" video] |
||
| − | <br clear="all"/> |
||
| − | |||
| − | ==='''Wiggle!'''=== |
||
| − | [[File:Level_2-3_Wiggle.png|thumb|400px|Wiggle! Running the wiggle tool fixes most of the problems with this puzzle. You can also use the shake tool to make the score go even higher.]] |
||
| − | This puzzle starts as a mess. There are large [[Voids|voids]], and several [[Hydrophobic|hydrophobics]] have nasty-looking yellow blobs that mean they are [[Exposeds|exposed]] to the water surrounding the protein. |
||
| − | |||
| − | The new [[Wiggle|wiggle]] tool fixes many of these problems. Just click on wiggle, let it run for a bit, then click on stop. This should solve the puzzle, no dragging required. |
||
| − | |||
| − | You can also use the [[Shake Sidechains|shake]] tool to score even more points. Try using wiggle, shake, then wiggle again. |
||
| − | |||
| − | Technical stuff: wiggle is what the scientists may call a "minimizer". Behind the scenes, wiggle is doing calculations, trying to minimize the "free energy" in the protein. Free energy is bad because it tends to push the protein apart. As free energy goes down, your score goes up. |
||
| − | |||
| − | [http://www.youtube.com/watch?v=A9BHyAJyvJs Madde's "Wiggle!" video] |
||
| − | <br clear="all"/> |
||
| − | |||
| − | == Hydrogen Bonding == |
||
| − | [[File:Level_3_Hydrogen_Bonding.png|thumb|400px|Level 3 Hydrogen Bonding intro puzzles.]] |
||
| − | Level 3 introduces [[Hydrogen bond|hydrogen bonds]], another thing that holds proteins together. Hydrogen bonds show as blue-and-white "candy canes" in Foldit. |
||
| − | |||
| − | This level includes techniques for lining up [[Sheet|sheets]] that are used all the time by Foldit players. [[Rubber Bands|Bands]] are important for moving sheets and other parts of the protein, and can also be used to help keep things in place. |
||
This level also introduces the [[Remix|remix]] tool, which searches for new shapes for your protein. |
This level also introduces the [[Remix|remix]] tool, which searches for new shapes for your protein. |
||
<br clear="all"/> |
<br clear="all"/> |
||
| + | <gallery widths="120" spacing="small" captionsize="small" captionalign="center" navigation="true" hideaddbutton="true"> |
||
| − | ==='''Sheets Together'''=== |
||
| + | Quest_to_the_Native.png|Quest to the Native|link=Intro_Puzzles/Quest_to_the_Native |
||
| − | [[File:Level_3-1_Sheets_Together.png|thumb|400px|Sheets together. There's already one blue-and-white hydrogen bond between the sheets. Pulling the sheets closer together makes more bonds. Shake and wiggle to finish the puzzle.]] |
||
| + | Movin'_Along.png|Movin' Along|link=Intro_Puzzles/Movin'_Along |
||
| − | This puzzle has two [[Sheet|sheets]]. If you look closely, there's already a [[Hydrogen bond|hydrogen bond]] -- a blue-and-white "candy cane" -- between the sheets. |
||
| + | Electron_Density.png|Electron Density|link=Intro_Puzzles/Electron_Density |
||
| + | Remix.png|Remix|link=Intro_Puzzles/Remix |
||
| + | </gallery> |
||
| + | ==Sequences== |
||
| + | Sequences introduces the alignment tool. The alignment tool lets you apply the shapes of other proteins to the protein you're working on. |
||
| + | You'll also get to use [[Cutpoints|cuts]], which chop a protein into pieces. Cuts are used in all kinds of ways in Foldit. |
||
| − | If you drag the sheets closer together, you'll see more hydrogen bonds form between the sheets. If you drag the sheets too close, you'll get [[Clashes|clashes]]. |
||
| − | |||
| − | [[Shake Sidechains|Shake]] and [[Wiggle|wiggle]] to finish the puzzle. |
||
| − | |||
| − | Technical stuff: a sheet by itself doesn't do too much good. A single sheet is sometimes called a "strand", which may tell you something. When sheets are bonded together edge-to-edge like this, they help to stabilize the protein. |
||
| − | |||
| − | [https://www.youtube.com/watch?v=zx8b7WWfvms Madde's "Sheets Together" video] |
||
<br clear="all"/> |
<br clear="all"/> |
||
| + | <gallery widths="120" spacing="small" captionsize="small" captionalign="center" navigation="true" hideaddbutton="true"> |
||
| − | |||
| + | Structure_and_Idealize.png|Structure and Idealize|link=Intro_Puzzles/Structure_and_Idealize |
||
| − | ==='''Lonely Sheets'''=== |
||
| + | Basic_Threading.png|Basic Threading|link=Intro_Puzzles/Basic_Threading |
||
| − | [[File:Level_3-2_Lonely_Sheets.png|thumb|400px|Lonely sheets. Draw bands between the two sheets, then wiggle to pull them together. Shake for extra points.]] |
||
| + | Cut_and_Paste.png|Cut and Paste|link=Intro_Puzzles/Cut_and_Paste |
||
| − | This puzzle has two small sheets a long way apart. The two sheets should be bonded together, but just wiggling won't get them there. |
||
| + | Alignin'_Sequences.png|Alignin' Sequences|link=Intro_Puzzles/Alignin'_Sequences |
||
| − | |||
| + | </gallery> |
||
| − | You can draw [[Rubber Bands|bands]], and then wiggle. The bands pull things together when you wiggle. |
||
| + | ==Conditions== |
||
| − | |||
| + | This level covers [[Conditions|conditions]], which enforce special rules on some puzzles. Conditions may change your score, adding or subtracting points. Conditions were previously called "filters". |
||
| − | To draw a band, hold shift and then click on the end of one sheet, and drag to the end of the other sheet. This draws a band between the two sheets. Make two bands between the top and bottom ends of the two sheets. |
||
| − | |||
| − | If you just shift-click on a segment without dragging, you [[Freeze|freeze]] the segment. Freezing is useful later on, but for now, either shift-click again or use to the keyboard shortcut "f" to unfreeze. |
||
| − | |||
| − | While drawing a band, if you let go before you get to the other sheet, you create a "spaceband". Spacebands are often useful, but not here. Either click on the band to delete it, or use the "Remove bands" button (keyboard shortcut "r"), which deletes all bands. |
||
| − | |||
| − | Shake and wiggle to finish the puzzle. Try deleting the bands and shaking and wiggling again for even more points. |
||
| − | |||
| − | Technical stuff: bands between two segments have a length that's measured in [[Angstrom]]s. You can right-click (or ctrl-click for Mac) on a band and select "Change band length" to change the length of a band. Each band between segments has a current length, and a "goal" length, which is what change band length changes. The little cones on the band show the goal length, which is how long the band ''wants'' to be. |
||
| − | |||
| − | [https://www.youtube.com/watch?v=ohBd3BKOQH4 Madde's "Lonely Sheets" video] |
||
<br clear="all"/> |
<br clear="all"/> |
||
| + | <gallery widths="120" spacing="small" captionsize="small" captionalign="center" navigation="true" hideaddbutton="true"> |
||
| − | |||
| + | Make_Five_Bonds_(icon).png|Make Five Bonds|link=Intro_Puzzles/Make_Five_Bonds |
||
| − | ==='''Sheets and Ladders'''=== |
||
| + | Disulfide_Bonds_(icon).png|Disulfide Bonds|link=Intro_Puzzles/Disulfide_Bonds |
||
| − | [[File:Level_3-3_Sheets_and_Ladders.png|thumb|400px|Sheets and ladders. |
||
| + | Combo_Conditions_(icon).png|Combo Conditions|link=Intro_Puzzles/Combo_Conditions |
||
| − | Draw bands between the sheets then wiggle to pull them together. Shake may help. Try deleting the bands then wiggle and shake again to gain more points.]] |
||
| + | </gallery> |
||
| − | This puzzles starts with three [[Sheet|sheets]] some distance apart. Draw bands between the sheets, then wiggle to pull them together. The goal is to make as many [[Hydrogen bond|hydrogen bonds]] between the sheets as possible. |
||
| + | ==Blueprint== |
||
| − | |||
| + | This level introduces the blueprint tool, which is used in [[Design puzzle|design puzzles]] to insert shapes found in natural proteins. The blueprint tool may help players create proteins which fold up on their own like natural ones. Design puzzles are covered in more detail in the next section. |
||
| − | About three bands between each pair of sheets should be enough. |
||
| − | |||
| − | You'll notice there are blue dots and red dots along the edges of the sheets. The blue dots can form hydrogen bonds with the red dots. Also, the red dots are on "hills" and the blue dots are in "valleys". The hills and valleys should fit together. |
||
| − | |||
| − | After wiggle, try shake for a few extra points. Delete the bands, then wiggle and shake again for even more points. |
||
| − | |||
| − | Technical stuff: notice that the sheets in this puzzle aren't flat like the ones in the first couple of puzzles. Welcome to real life. Nothing is very flat or straight in the protein world. |
||
| − | |||
| − | [https://www.youtube.com/watch?v=eHcDXtKlR6U Madde's "Sheets and Ladders" video] |
||
<br clear="all"/> |
<br clear="all"/> |
||
| + | <gallery widths="120" spacing="small" captionsize="small" captionalign="center" navigation="true" hideaddbutton="true"> |
||
| − | |||
| + | Hello_Blueprint_(icon).png|Hello Blueprint|link=Intro_Puzzles/Hello_Blueprint |
||
| − | ==='''Lock and Lower'''=== |
||
| + | More_Building_Blocks_(icon).png|More Building Blocks|link=Intro_Puzzles/More_Building_Blocks |
||
| − | [[File:Level_3-4_Lock_and_Lower.png|thumb|400px|Lock and Lower. One sheet is sticking out. Use bands to pull it toward the sheets on either side. Use freezing or bands to keep the sheets that are already bonded from pulling apart.]] |
||
| + | Blueprint_and_Condition_(icon).png|Blueprint and Condition|link=Intro_Puzzles/Blueprint_and_Condition |
||
| − | In this puzzle, one sheet is pointing off into space. A group of three sheets is already bonded together. Another sheet is off to one side, connected to the out-of-line sheet by a short section of [[Loop|loop]]. |
||
| + | </gallery> |
||
| − | |||
| + | ==Protein Design== |
||
| − | The goal is to pull all five sheets together into one unit. The first step is to draw bands between the out-of-line sheet and the sheet on either side. Here you'll probably need five or six bands between each sheet. |
||
| + | This level introduces Foldit [[Design puzzle|design puzzles]], which give players the chance to design new proteins. Some of these designs actually get turned into real proteins in the Foldit lab, see [[Design puzzle results|design puzzle results]] for more. |
||
| − | |||
| − | It will probably help to rotate the protein, by clicking and dragging on the white background, before trying to draw bands. |
||
| − | |||
| − | If you wiggle after drawing bands, you'll probably see the sheets that are already bonded start to pull apart, breaking the hydrogen bonds. This is where [[Freeze|freezing]] comes in handy. If you double-click on a sheet, the sheet freezes, which prevents it from changing shape. In this case, freezing should keep the bonded sheets bonded. |
||
| − | |||
| − | If you want, you can draw bands between the bonded sheet instead of freezing. You don't necessarily need to band every hydrogen bond, but at least three or four bands for each pair of sheets is a good idea. |
||
| − | |||
| − | As usual, wiggle and shake to finish. If results are good, you raise your score by unfreezing with the "Unfreeze Protein" button (keyboard shortcut "f"), followed by another round of wiggle-shake-wiggle. Finally, remove bands with the "Remove Bands" button (keyboard shortcut "r") and then wiggle-shake-wiggle one last time. |
||
| − | |||
| − | Technical stuff: this protein looks a more realistic than some of the earlier examples. |
||
| − | |||
| − | [https://www.youtube.com/watch?v=_-bNtEcb2fQ Madde's "Lock and Lower" video] |
||
<br clear="all"/> |
<br clear="all"/> |
||
| + | <gallery widths="120" spacing="small" captionsize="small" captionalign="center" navigation="true" hideaddbutton="true"> |
||
| + | Intro_to_Design.png|Intro to Design|link=Intro_Puzzles/Intro_to_Design |
||
| + | Swappin'_Sidechains.png|Swappin' Sidechains|link=Intro_Puzzles/Swappin'_Sidechains |
||
| + | Mass_Mutate.png|Mass Mutate|link=Intro_Puzzles/Mass_Mutate |
||
| + | Insertion_and_Deletion.png|Insertion and Deletion|link=Intro_Puzzles/Insertion_and_Deletion |
||
| + | </gallery> |
||
| + | ==More Molecules== |
||
| + | The More Molecules level introduces [[Ligand|ligands]]. A ligand is a non-protein atom or molecule. A ligand can be as small as copper or calcium atom, or as large as a strand of DNA. |
||
| + | These puzzles work with fixed ligands that can't be changed. A new small molecule design feature is in development for Foldit. This will allow the ligand to be designed, much as current designs puzzles allow proteins to be designed. |
||
| − | ==='''Remix'''=== |
||
| − | [[File:Level_3-5_Remix.png|thumb|400px|Remix. Right-clicking on the red segments lets you select the remix tool. You can then pick a good remix from the list of results, then wiggle and shake as usual to finish.]] |
||
| − | In this puzzle, a section of [[Loop|loop]] is shown in red, meaning it's not scoring well. |
||
| − | |||
| − | The [[Remix|remix]] tool can be used to find a better shape for this section. |
||
| − | |||
| − | To use the rebuild, right click (or control-click on Mac) on one of the red segments and select "Remix" from the wheel menu. |
||
| − | |||
| − | [[File:Level_3-5_Remix_Wheel_Menu.png|thumb|400px|Remix tool in wheel menu.]] |
||
| − | After a short delay, the remix tool should give you a list of different remixes. The remix for the problem area on this puzzle should show 30 results. You can use the arrows to move through the results. (The help bubble says "cycle through fragments", but what it means is "look at results".) |
||
| − | [[File:Level_3-5_Remix_Remix_List.png|thumb|364px|Remix tool Remix List. Clicking the arrow changes the shape of the section being remixed. Click the stop button, when you see a good remix, then shake and wiggle.]] |
||
| − | When you see a result that looks good, click on the stop button. You'll need to shake and wiggle as usual to see how that remix turns out. It's usually best to shake first, then wiggle, especially if you see clashes. |
||
| − | |||
| − | If a remix doesn't work out, even after a couple of rounds of shake and wiggle, you can try resetting the puzzle and picking a new remix. Or you can remix again, without resetting. You'll probably see a different number of remixes in that case. You can also use bands and freezes as in the previous puzzle to try and fix things. |
||
| − | |||
| − | Technical stuff: this puzzle used to be called "rebuild". You can still see the [[Rebuild|rebuild]] tool in the wheel menu, but it's greyed out in this puzzle. The [[Remix|remix]] tool has been around awhile, but it recently got a big facelift. Both remix and rebuild work by picking "fragments" from a database of existing proteins, but the details of the two tools are very different. Rebuild picks fragments based on the [[Amino Acids|amino acid]] sequence of what's being rebuilt. Remix picks its fragments based on the ''shape'' of what's being remixed, picking similar shapes. The thinking back at Foldit central is that remix is better at picking realistic shapes, while rebuild may give the head of an eagle on the body of a donkey with the legs of an amoeba. Somewhat confusingly, the more realistic shapes are also known as "ideal" shapes, see [[Ideal Loops|ideal loops]] for more on why. |
||
| − | |||
| − | [https://www.youtube.com/watch?v=Xm2GZuIeJIU Madde's "Rebuild" video] is now out-of-date, but the most of the steps are similar to use the remix tool. The biggest difference is that remix gives you a list of results to review, where rebuild just keeps trying different shapes. We ''wish'' rebuild worked that way. |
||
| − | <br clear="all"/> |
||
| − | |||
| − | == Hydrophobics and Hydrophilics == |
||
| − | [[File:Level_4_Hydrophobics_and_Hydrophilics.png|thumb|400px|Level 4 Hydrophobics and Hydrophilics intro puzzles.]] |
||
| − | Level 4 discusses [[Hydrophobic|hydrophobics]] and [[Hydrophilic|hydrophilics]] in more detail. Orange sidechains are hydrophobic, and should be hidden on the inside of the protein. Blue sidechains are hydrophilic, and are OK on the outside of the protein. |
||
| − | |||
| − | ==='''Hide the Hydrophobic'''=== |
||
| − | [[File:Level_4-1_HIde_the_Hydrophobic.png|thumb|400px|Hide the Hydrophobic. Rotate the orange sidechain to get rid of the yellow "exposed" blob. Twist the blue sidechain to get rid of the spiky red "clash".]] |
||
| − | In this puzzle, one sidechain has a blotchy yellow [[Exposeds|exposed]] , and another has a spiky red [[Clashes|clash]]. |
||
| − | |||
| − | As we've seen earlier, orange sidechains are [[Hydrophobic|hydrophobic]] . They want to be buried inside the protein. |
||
| − | |||
| − | Blue sidechains are [[Hydrophilic|hydrophilic]]. The longest hydrophilics need plenty of space, and should point outward. Smaller hydrophilics can be on the inside of a protein without causing problems. |
||
| − | |||
| − | To fix this puzzle, rotate the orange sidechain to the right. Pull the blue sidechain so it points outward. That's it, no wiggling or shaking needed once you get rid of the exposed and the clash. |
||
| − | |||
| − | Technical stuff: see [[Hydrophobicity|hydrophobicity]] for more on hydrophobics versus hydrophilics. Check out the [[Amino Acid Gallery (EnzDes coloring)|Amino Acid Gallery]], which helps make it clear why [[Arginine|arginine]], [[Lysine|lysine]], [[Glutamic acid |glutamate]], and [[Glutamine|glutamine]] are better on the outside. |
||
| − | |||
| − | [http://www.youtube.com/watch?v=Dcf9BTktNKE Madde's "Hide the Hydrophobic" video] |
||
| − | <br clear="all"/> |
||
| − | |||
| − | ==='''Turn It Down'''=== |
||
| − | [[File:Level_4-2_Turn_It_Down.png|thumb|400px|Turn It Down. Right-click on the helix and select "Tweak". Then use the purple arrow to rotate the helix counter-clockwise.]] |
||
| − | This puzzle has a helix with one sidechain showing. The sidechain is red, indicating it's not scoring well. (The sidechain does not have an [[Exposeds|exposed]] blob on it, however.) |
||
| − | |||
| − | Right-clicking the red sidechain (or anywhere on the helix) brings up a wheel menu like the one seen in the remix puzzle. Select the "Tweak" tool from this menu. |
||
| − | [[File:Level_4-2_Turn_It_Down_Tweak_tool.png|thumb|400px|Tweak tool in action. Rotate the helix counter-clockwise a bit.]] |
||
| − | The Tweak tool show purple arrows close to the helix. Click and drag on the arrows to rotate the helix counter-clockwise. Then stop the tweak tool and shake and wiggle as usual. |
||
| − | |||
| − | [https://www.youtube.com/watch?v=UaNn8rYdXxo Madde's "Turn It Down" video] |
||
| − | <br clear="all"/> |
||
| − | |||
| − | ==='''Flippin' Sheets'''=== |
||
| − | [[File:Level_4-3_Flippin'_Sheets.png|thumb|400px|Flippin' Sheets. Use the tweak tool to flip the section sheet from the top. No relation to Flippin, Arkansas.]] |
||
| − | In this puzzle, the second sheet from the top has two [[Hydrophobic|hydrophobics]] with blotchy yellow [[Exposeds|exposeds]] on them. |
||
| − | |||
| − | In the previous puzzle, the [[Tweak|tweak]] tool was used to rotate a helix. In this puzzle, the tweak tool is used to "flip" a sheet. This turns the sheet over and moves it over a bit. In this case, flipping the sheet will hide the two hyrdophobics in the [[Core|core]] of the protein. |
||
| − | |||
| − | Right-click anywhere on the second sheet and select "Tweak" from the wheel menu. The tweak tool shows purple arrows next to the sheet. Click on the right side of one of the arrow to flip the sheet. |
||
| − | |||
| − | Flipping the sheet is the easy part. This puzzle has the reputation of being a little bit "touchy", but "buggy" is probably a better term. |
||
| − | |||
| − | For some reason, the [[Shake Sidechains|shake]] tool doesn't produce points after you flip the sheet. Shake should so ''something'' in this case, since lots of sidechains have moved. The protein will fly apart if you [[Wiggle|wiggle]] it after the flip. |
||
| − | |||
| − | To get around this, freeze all four sheets by shift double-clicking on each one. Then start to wiggle. The protein will still pull apart, but it should start to come together again. When the sheets are bonded again, stop the wiggle and shake. Shake should now gain points. Stop the shake, and click on "Unfreeze Protein" (or keyboard shortcut "f"). Then wiggle again. This should be enough to complete the puzzle. |
||
| − | |||
| − | As usual, you can shake and wiggle a few more times to improve your score. |
||
| − | |||
| − | You can also draw [[Rubber Bands|bands]] between the sheets to hold them together, instead of or in addition to freezing them. |
||
| − | |||
| − | Technical stuff: yes, Foldit has bugs. The Computer Science kind, not the Biology kind. Foldit player [http://fold.it/portal/user/83730 LennStar] pointed out that this intro puzzle had problems way back in 2009. |
||
| − | |||
| − | [https://www.youtube.com/watch?v=a3FhBTEhqew Madde's "Flippin' Sheets" video] |
||
| − | <br clear="all"/> |
||
| − | |||
| − | ==='''The Right Rotation'''=== |
||
| − | [[File:Foldit_1303940437.png|thumb|400px|Right rotation]] |
||
| − | Orange pointing in, blue pointing out. Right click a helix to Tweak it. |
||
| − | |||
| − | ''Tip: turn the helix shown to hide the orange, expose the blue, shake and wiggle'' |
||
| − | |||
| − | [https://www.youtube.com/watch?v=zAROU1DiMIM Madde's "The Right Rotation" video] |
||
| − | <br clear="all"/> |
||
| − | |||
| − | ==='''Structure and Rebuild'''=== |
||
| − | [[File:Structure_and_rebuild.png|thumb|400px]] |
||
| − | Changing the structure of the protein can help you Rebuild. All these segments should be helices. Double click this loop to select the entire secondary structure. To enter Structure Mode, click the Modes tab and choose Structure, or press 2. Press 2 to enter Structure Mode. Click here to assign the selected part to helices Then start to Rebuild. You can stop when it Rebuilds to something look like a complete helix (Like a spring). Try a Shake and Wiggle to clean it up. (Don't forget to unselect the puzzle by clicking any place on the background in order to do global Wiggle.) You can click on this part that is already helix and hold your mouse down. Drag your mouse to the end. Did you see the change? Now switch back to Pull Mode, and try to rebuild the whole thing to see what's going to happen. Right click on any segments and start Rebuilding. You can stop when it Rebuilds to something look like a whole long helix (Like a spring). And try a Shake and Wiggle to clean it up. |
||
| − | |||
| − | ''Tip: Reset and follow the instructions with care. Rebuild a long time.'' |
||
| − | |||
| − | [https://www.youtube.com/watch?v=KG2LOUX3DZE Madde's "Structure and Rebuild" video] |
||
| − | <br clear="all"/> |
||
| − | |||
| − | == Tools and Types == |
||
| − | [[File:Level_5_Tools_and_Types.png|thumb|400px|Level 5 Tools and Types intro puzzles.]] |
||
| − | Level 5 introduces some of the different [[101_-_Puzzle_Levels_and_Types|puzzle types]] found in Foldit.< |
||
| − | <br clear="all"/> |
||
| − | ==='''Quest to the Native'''=== |
||
| − | [[File:Foldit_1311186353.png|thumb|400px|Quest to the Native (QTTN)]] |
||
| − | In this puzzle, the correct solution, called a NATIVE, is known. To align the guide with a specific section of the protein, Right click any segment and click ALIGN GUIDE. Use the tools available to match the protein with the guide. If you haven't discovered it yet, you can attach a rubber band from the protein to a point in empty space. Rubber bands also affect the pull tool, not just wiggle. Remember to freeze parts of the protein that you don't want warped by wiggle or pull. |
||
| − | |||
| − | ''Tip: Put bands and wiggle to move most of the protein inside the cloud. Remove the band, shake and wiggle.'' |
||
| − | |||
| − | [http://www.youtube.com/watch?v=xnCuiTMnLVY Madde's "Quest to the Native" video] |
||
| − | |||
| − | <br clear="all"/> |
||
| − | ==='''Movin' Along'''=== |
||
| − | [[File:Foldit_1303941254.png|thumb|400px|Movin' along]] |
||
| − | Sometimes you can MOVE whole pieces of the protein. Click on a piece to bring up the MOVE tool. Then press and hold down RIGHT BUTTON (CTRL on Mac) anywhere on the tool to drag the piece around. You can't pull on the backbone of this puzzle. |
||
| − | |||
| − | ''Tip: Click on the helix, then in the middle of the purple cross with the right button of your mouse (use crtl+click on Mac), then drag the helix on the shadow (if the helix rotates, you have click two times the left button), shake, rotate the view to check the sidechains then wiggle. Reset and redo, many players don't have success the first time.'' |
||
| − | |||
| − | [http://www.youtube.com/watch?v=Q2x03y6e4Kk Madde's "Movin' Along" video] |
||
| − | <br clear="all"/> |
||
| − | |||
| − | ==='''Electron density'''=== |
||
| − | [[File:Foldit_1311183819.png|thumb|400px|Electron Density puzzle]] |
||
| − | In an Electron Density puzzle, we only have data on the rough shape of the protein. You are given this data as a 3D surface that predicts the general areas where parts of the protein are located. The backbone of the protein will fit neatly inside the 3D region, but it's up to you to work out how it fits. |
||
| − | Click on the ELECTRON DENSITY button. These options let you control how the density surface is drawn. Adjust the THRESHOLD to change the thickness of the density region. At a good threshold, you can see shapes in the region that match parts of the protein. After moving the protein press ALIGN PROTEIN TO DENSITY to line up the surface with the protein. The alignment usually takes a few seconds to complete. Use Shake, Wiggle, and careful moving to fold the protein into the best possible shape that fits inside the predicted region. |
||
| − | |||
| − | ''Tip: Wiggle, shake, wiggle, shake, then drag the end of protein inside the cloud with caution, shake, wiggle. You can also put bands to join the sheets together inside the cloud.'' |
||
| − | |||
| − | [http://www.youtube.com/watch?v=jDOY1QIGkog Madde's "Electron Density" video] |
||
| − | <br clear="all"/> |
||
| − | |||
| − | ==='''Exploration'''=== |
||
| − | [[File:Foldit_1311184560.png|thumb|400px|Exploration]] |
||
| − | In [[Exploration Puzzle|exploration puzzles]] like this one, your goal is to find a solution that is different from the starting structure. Your calculated score will be the protein's base score times an exploration multiplier for finding new configurations. You can use the Contact Map to help you find new configurations for the protein. The rows and columns in Contact Map correspond to segments of the backbone. A black mark indicates that the segments corresponding to that row and column are in contact. The red areas are contacts present in the starting structure. White areas are new contacts, which increase your score multiplier. You can click on TUTORIAL to learn more about Exploration puzzles. Use all the tools you have learned to fold this protein into a new shape. Don't be afraid to break some connections to make new ones. |
||
| − | |||
| − | ''Tip: Try lining up all 4 sheets with bands.'' |
||
| − | |||
| − | [http://www.youtube.com/watch?v=AAh3ThsxohQ Madde's "Exploration" video] |
||
| − | <br clear="all"/> |
||
| − | |||
| − | ==='''Control Over Clashing'''=== |
||
| − | [[File:Crashing.jpg|thumb|400px|Clashing importance]] |
||
| − | You may have noticed that using Wiggle when there are many clashes causes the protein to come apart. To avoid this, lower the [[Clashing_Importance|CLASHING IMPORTANCE]] . This lets Wiggle keep making small adjustments even if the protein is packed too tight. A lower Clashing Importance also lets you make moves that add clashes without unraveling the protein, like pulling on a tangled strand. Try setting Clashing Importance to 0.1, then Wiggle while slowly increasing it. |
||
| − | |||
| − | ''Tip: Follow the instructions, move the clashing importance by step and wiggle until the score decrease. If the protein explose, reset and redo more slowly.'' |
||
| − | |||
| − | [http://www.youtube.com/watch?v=TdC-9fmXdjY Madde's "Control Over Clashing" video] |
||
| − | <br clear="all"/> |
||
| − | |||
| − | == Sequences == |
||
| − | [[File:Level_6_Sequences.png|thumb|400px|Level 6 Sequences intro puzzles.]] |
||
| − | Level 6 introduces the alignment tool. |
||
| − | <br clear="all"/a/> |
||
| − | |||
| − | ==='''Basic Threading'''=== |
||
| − | |||
| − | [[File:Foldit_1303941845.png|thumb|400px|Basic alignment]] |
||
| − | These levels will introduce the powerful [[The Alignment Tool|'''ALIGNMENT''']] tool! It will let you use the structures of real proteins, called '''TEMPLATES,''' by '''THREADING'''. Click on the smiley button to bring up the ALIGNMENT tool. This 3D structures shows the backbone of the template. The bottom row of the letters is the TEMPLATE SEQUENCE. you can see it in 3D as spheres connected by lines. The top row of letters is the sequence of your protein. The cylinders in 3D show how its backbones lines up with the template. |
||
| − | |||
| − | When you THREAD, your protein will try to fit onto the 3D template where the cylinders are. Click the little smiley to try threading. Now that you've threaded it, try a shake and wiggle! |
||
| − | |||
| − | In this puzzle, you'll just need to use the ALIGNMENT tool to thread, then wiggle and shake. Don't worry about making manual adjustments. In this puzzle, you'll just need to use the ALIGNMENT tool to thread, then shake and wiggle. |
||
| − | |||
| − | [http://www.youtube.com/watch?v=acOqUT93hvc Madde's "Basic Threading" video] |
||
| − | <br clear="all"/> |
||
| − | |||
| − | ==='''Cut and paste'''=== |
||
| − | [[File:Cut_tool.png|400px|thumb]] |
||
| − | This blue band is a CUT. A CUT appears when the backbone of the protein has been cut. You need to close the CUT to complete the puzzle! To close the CUT, left click on one segment to bring up the MOVE tool, and then move the pieces together until the CUT turns yellow. Then click the CUT. Now SHAKE and WIGGLE to finish up! |
||
| − | ''Tip: the move tool : left click then right click on the purple cross.'' |
||
| − | |||
| − | [http://www.youtube.com/watch?v=yLnvVCulajo Madde's "Cut and paste" video] |
||
| − | <br clear="all"/> |
||
| − | |||
| − | ==='''Alignin' Sequences'''=== |
||
| − | [[File:Alignment_-cut_point.png|thumb|400px]] |
||
| − | Bring up the alignment tool again. This time the letters and colors in the sequences are not lined up well.This middle row shows how well each letter matches; a bigger white bar means a better match. And this score (on the right) shows how the sequences match overall . You can click and drag or use the arrow keys to move the letters around. Try to line up the colors. It's okay if there are spaces, but fewer spaces is better. Enabling THREADING will let you see the changes to the protein now, or you can wait until you're done to THREAD. When there's a gap in the aligment, a CUT is inserted. When you're done aligning, move the two pieces together, then WIGGLE and click when the band turns yellow to close the cut. Good, now SHAKE and WIGGLE to finish up!" |
||
| − | |||
| − | ''Tip: follow the instructions carefully. '' |
||
| − | |||
| − | [https://www.youtube.com/watch?v=TNi1b1HxEKE Madde's "Alignin' Sequences" video] |
||
| − | <br clear="all"/> |
||
| − | |||
| − | == Protein Design == |
||
| − | [[File:Level_7_Protein_Design.png|thumb|400px|Level 7 Protein Design intro puzzles.]] |
||
| − | Level 7 introduces Foldit [[Design puzzle|design puzzles]], which give players the chance to design new proteins. Some of these designs actually get turned into real proteins in the Foldit lab, see [[Design puzzle results|design puzzle results]] for more. |
||
| − | <br clear="all"/> |
||
| − | ==='''Intro to Design'''=== |
||
| − | |||
| − | [[File:Foldit_1304184551.png|thumb|400px|6-1 tutorial]] |
||
| − | Welcome to the design puzzles. In these challenges you will have the power to design new proteins! Segments with brighter colors can be designed! Some of these sidechains are too large. You can change them in Design Mode. To enter Design Mode, click the Modes tab and choose Design, or press 4. Select the segments you want to mutate. Click the Mutate Button from the menu. Then click the picture of the sidechain you want to mutate to Try to find better fits for both designable sidechains. If you're stuck, it may be easier to restart from the beginning. |
||
| − | |||
| − | [http://www.youtube.com/watch?v=HLP9c7-EMiY Madde's "Intro to Design" video] |
||
| − | <br clear="all"/> |
||
| − | |||
| − | '''Swappin' Side Chains''' |
||
| − | |||
| − | [[File:Foldit_1304184666.png|thumb|400px|6-2 tutorial]] |
||
| − | |||
| − | Now some sidechains are too small, causing voids! Try replacing them with some large ringed hydrophobics. |
||
| − | |||
| − | You'll need to change to Design Mode. |
||
| − | |||
| − | [http://www.youtube.com/watch?v=m-ZE1P2XjS8 Madde's "Swappin' Side Chains" video] |
||
| − | <br clear="all"/> |
||
| − | |||
| − | ==='''Mass Mutate'''=== |
||
| − | |||
| − | [[File:Foldit_1304185147.png|thumb|400px|6-3 tutorial]] |
||
| − | This helix has a lot of unburied orange hydrophobics. You can change them to blue hydrophilics in Design Mode. You've earned a new tool! Mutate Sidechains is like Shake, but may mutate designable sidechains. Stop the Mutate Sidechains by pressing the space bar. |
||
| − | |||
| − | ''Tip: Don't reset on this puzzle, go to menu/ intro puzzle and click on mass mutate.'' |
||
| − | |||
| − | [http://www.youtube.com/watch?v=zR2RiUVRbMI Madde's "Mass Mutate" video] |
||
| − | <br clear="all"/> |
||
| − | |||
| − | ==='''Insertion and Deletion'''=== |
||
| − | |||
| − | This red line is a CONSTRAINT, indicating that the segments it connects should be closer together. You can change the length of the helix by inserting or deleting segments. Right click a segment of the helix and use Insert Between. The blue blinking segments will show you where it will appear. The protein seems a little short now. You may want to undo or insert a segment. You can use wiggle and mutate sidechains to finish up. The protein seems a little long now. You may want to undo or delete a segment. |
||
| − | |||
| − | [http://www.youtube.com/watch?v=65aVNU9jdmo Madde's "Insertion and Deletion" video] |
||
| − | <br clear="all"/> |
||
| − | |||
| − | == More Molecules == |
||
| − | [[File:Level_8_More_Molecules.png|thumb|400px|Level 8 More Molecules intro puzzles]] |
||
| − | Level 8 introduces [[Ligand|ligands]]. |
||
| − | <br clear="all"/> |
||
| − | ==='''Ligand Debut'''=== |
||
| − | [[File:Foldit_1304187720.png|thumb|400px|ligand]] |
||
| − | These levels contain molecules other than proteins! This small molecule is a LIGAND. Proteins can be designed to bind ligands. Hydrogen bonds are important for binding ligands. Connect red atoms with blue atoms to form bonds between the ligand and sidechains! Left click on the ligand to bring up MOVE tool. RIGHT-button-drag to move left, right, up, and down, LEFT-button-drag to rotate and SHIFT-LEFT (or MIDDLE) -button-drag to move ligand Into/Out of screen. When the ligand is in a good place, try a wiggle! |
||
| − | |||
| − | [http://www.youtube.com/watch?v=YjQbM8p9FN0 Madde's "Ligand Debut" video] |
||
| − | <br clear="all"/> |
||
| − | |||
| − | ==='''Ligand Constraints'''=== |
||
| − | [[File:Foldit_1313226142.png|thumb|400px|ligand constraints]] |
||
| − | |||
| − | These are CONSTRAINTS. Red constraints are violated. Make the constraints become green! After moving the ligand closer, use WIGGLE SIDECHAINS to wiggle the sidechains and the ligand at the same time. Try and compare it to Shake Sidechains. |
||
| − | |||
| − | [http://www.youtube.com/watch?v=aBMnmvmT3Lo Madde's "Ligand Constraints" video] |
||
| − | <br clear="all"/> |
||
| − | |||
| − | ==='''DNA Pairing'''=== |
||
| − | [[File:Level_8-3_DNA_Pairing.png|thumb|400px|Level 8-3 DNA pairing.]] |
||
| − | |||
| − | Use Design Mode to find the correct match for the incorrectly paired sidechains. DNA sidechains pair according to color and size. Match sidechains of same color and opposite sizes to make lots of bonds! |
||
| − | |||
| − | Match sidechains of the same color and opposite sizes to form lots of hydrogen bonds! Look at this big yellow sidechain with a small yellow sidechain. Use Design Mode to find the right match for the incorrectly paired purple sidechains! |
||
| − | |||
| − | [https://www.youtube.com/watch?v=wR2Bc7cynBI Madde's "DNA Pairing" video] |
||
| − | <br clear="all"/> |
||
| − | |||
| − | ==='''DNA and Protein'''=== |
||
| − | [[File:Level_8-4_DNA_and_Protein.png|thumb|400px|Level 8-4 DNA and protein. ]] |
||
| − | DNA can hydrogen bond to protein. Mutate the proteins to form better bonds. Try adding a long hydrophilic here. Try a shorter, forked hydrophilic here. |
||
| − | |||
| − | [http://www.youtube.com/watch?v=3dK2u6iPnhA Madde's "DNA and Protein" video] |
||
<br clear="all"/> |
<br clear="all"/> |
||
| + | <gallery widths="120" spacing="small" captionsize="small" captionalign="center" navigation="true" hideaddbutton="true"> |
||
| + | Ligand_Debut.png|Ligand Debut|link=Intro_Puzzles/Ligand_Debut |
||
| + | Ligand_Constraints.png|Ligand Constraints|link=Intro_Puzzles/Ligand_Constraints |
||
| + | DNA_Pairing.png|DNA Pairing|link=Intro_Puzzles/DNA_Pairing |
||
| + | DNA_and_Protein.png|DNA and Protein|link=Intro_Puzzles/DNA_and_Protein |
||
| + | </gallery> |
||
[[Category:Help]] |
[[Category:Help]] |
||
[[Category:Help foldit]] |
[[Category:Help foldit]] |
||
| + | [[Category:Puzzle Types]] |
||
| + | [[Category:Intro Puzzle]] |
||
Revision as of 02:27, 22 March 2020
Success!
Intro Puzzles show you how to play Foldit. This special campaign level shows you how to use many of the tools, and explains some of the key ideas, like Clashes, Voids, and Exposeds.
Try to complete each puzzle without help first. Most of the puzzles should take only a couple of minutes. If you get stuck, use "Reset Puzzle" from the Actions menu in the lower left and try again.
New: the video QUICK Foldit Tutorial Walkthrough from S0ckrates shows you how to be the boss of the intro puzzles.
Intro Puzzle Tips covers some common questions like how to band and freeze. It also gives some keyboard shortcuts for view options that may help you see what's going on.
If you're having problems, you'll find tips below. Just click on the icon for the puzzle you're stuck on. There are tips and techniques for each puzzle. Each puzzle also YouTube videos provided by Foldit players Madde and Loci.
A few puzzles, such as Remix, Electron Density, and Hydrophobic Disaster, may require more time. These intro puzzles are closer to real Foldit puzzles.
If you have additional questions, ask online in the Foldit client using "Chat - Global", or "Chat - Group". See Foldit chat for more on Foldit chat. The following translations of this page are available: Deutsch | Svenska | Español | German | Russian | Japanese.
Intro puzzles are organized into levels. Click on the icons below for more information about each intro puzzle. The Intro Puzzle Master List has the same information in a simplified format.
Sidechains
The puzzles in the Sidechains level introduce sidechains and demonstrate ways to fix clashes. The shake tool makes its debut.
")
")
")
Backbone Packing
The Backbone Packing level introduces the backbone, the part which holds the protein together. The sidechains are attached to the backbone.
This level demonstrates how to fix voids. The wiggle tool is added to the mix. Wiggle and shake are the most important tools in Foldit.
")
")
")
Hydrogen Bonding
The Hydrogen Bonding level introduces hydrogen bonds, which help hold proteins together. Hydrogen bonds show as blue-and-white "candy canes" in Foldit.
This level includes techniques for lining up sheets that are used all the time by Foldit players. It adds bands, which are important for moving sheets and other parts of the protein.
")
")
")
")
")
")
Hydrophobics and Hydrophilics
This level discusses hydrophobics and hydrophilics in more detail. Orange sidechains are hydrophobic, and should be hidden on the inside of the protein. Blue sidechains are hydrophilic, and are OK on the outside of the protein.
")
")
")
")
Tools and Types
The Tools and Types level introduces some of the different puzzle types found in Foldit. The move tool is added.
This level also introduces the remix tool, which searches for new shapes for your protein.
")
")
")
")
Sequences
Sequences introduces the alignment tool. The alignment tool lets you apply the shapes of other proteins to the protein you're working on.
You'll also get to use cuts, which chop a protein into pieces. Cuts are used in all kinds of ways in Foldit.
")
")
")
")
Conditions
This level covers conditions, which enforce special rules on some puzzles. Conditions may change your score, adding or subtracting points. Conditions were previously called "filters".
")
")
")
Blueprint
This level introduces the blueprint tool, which is used in design puzzles to insert shapes found in natural proteins. The blueprint tool may help players create proteins which fold up on their own like natural ones. Design puzzles are covered in more detail in the next section.
")
")
")
Protein Design
This level introduces Foldit design puzzles, which give players the chance to design new proteins. Some of these designs actually get turned into real proteins in the Foldit lab, see design puzzle results for more.
")
")
")
")
More Molecules
The More Molecules level introduces ligands. A ligand is a non-protein atom or molecule. A ligand can be as small as copper or calcium atom, or as large as a strand of DNA.
These puzzles work with fixed ligands that can't be changed. A new small molecule design feature is in development for Foldit. This will allow the ligand to be designed, much as current designs puzzles allow proteins to be designed.
")
")
")
")