LociOiling (talk | contribs) (Hoist introductory paragraphs to the top, muck things about a bit.) Tag: rte-source |
(→Puzzle History: added paper result) Tags: Visual edit apiedit |
||
| Line 86: | Line 86: | ||
[http://fold.it/portal/node/995693 More Exciting Electron Density Results!] |
[http://fold.it/portal/node/995693 More Exciting Electron Density Results!] |
||
| + | |||
| + | [http://www.nature.com/articles/ncomms12549 Nature paper ! Determining crystal structures through crowdsourcing and coursework.] |
||
==External Links== |
==External Links== |
||
Revision as of 13:20, 27 March 2017
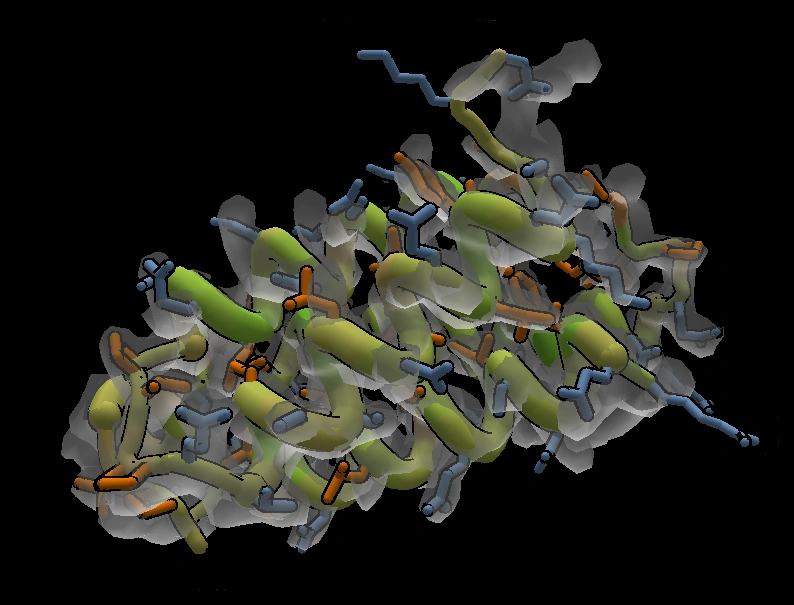
An Electron Density puzzle, in solid view mode.
Electron Density Puzzles consist of an unsolved protein and an electron density "cloud". The electron density cloud represents where the electrons of the protein's amino acids are likely to be found. The cloud is usually determined experimentally, and provides an insight into what the native structure of the protein will look like, once solved.
Electron density puzzles have a density component to the segment score. The more completely a segment is covered by the density cloud, the higher the score.
The objective of Electron Density puzzles is to fit the protein neatly into the electron density cloud, so that little or no part of the protein structure sticks out of the cloud, at a medium density threshold.
A segment may have a positive density score even when it lies outside the visible density cloud. Beyond the visible portion of the density, the same cloud repeats invisibly. Segments may end up aligned with in this invisible density cloud.
In some puzzles, such as 1152: Foldit vs. UMich Electron Density Challenge, the entire protein may not fit within the visible portion of the electron density cloud.
Electron Density Panel
The Electron Density panel.
The display of the cloud is controlled by the Electron Density panel, available via the shift+e keyboard shortcut.
The electron density panel contains several view options:
- None - the electron density cloud is not displayed
- Solid - the cloud is displayed as a solid mass, ranging from translucent to opaque based on the "alpha" setting
- Wireframe - the cloud is displayed as a mesh surface, with the protein visible through the spaces in the mesh
- Isocontours - the cloud is displayed as a faint translucent surface marked with bright isocountour lines
- Grid - the cloud is displayed as a faint translucent surface marked with a bright rectangular grid
The "Enable Backface Culling" option, when checked, removes parts of the cloud away from the viewer. The effect of backface culling is most noticeable with the Wireframe, Isocountours, and Grid options. It also affects the appearance of the Solid view options at low settings of the alpha slider.
The Red, Green, and Blue sliders can be used to adjust the color of the cloud.
The Alpha slider controls the overall brightness of the cloud. With the Solid view option, it can be used to change the cloud from translucent to opaque.
The Threshold slider controls the level of density displayed. When the slider is at low value, the cloud is larger because areas of lower density (lower probability of an electron being present) are displayed. With the slider at its highest value, the cloud may disappear or show only in isolated spots.
A medium-high setting of the Threshold slider tends to highlight the protein's backbone, while a medium-low setting may reveal the shape of sidechains.
In addition the view-related options and control, the Electron Density panel has several tools for working with the density.
The Focus on Density button centers the display on the density cloud. This allows the cloud to rotated and zoomed, and not the protein. This option is most useful when the protein is outside of the cloud.
The Center Protein on Density button moves the protein into the density cloud. This option is most useful when the protein has been folded outside the cloud.
The Trim Density button allows the user to trim the density based it's current distance from the protein's backbone. See Electron Density Trim for more.
The Clear Density Notes button removes any density notes. Density notes are created by hovering over the cloud at an interesting spot, and hitting the tab key. A colored dot is added the cloud at the spot. Clicking on the colored dot allows the user to add text describing the spot. Density notes can be helpful in identifying sidechains or structures such as helixes and sheets.
Right-clicking (or command-clicking) on a density note spot lets the user change the color of the spot's dot.
When adding a density note, the spot be away from the protein. Hitting tab while hovering over the protein opens a segment note.
Keyboard Shortcuts for View Options
It can be difficult to see features in the electron density cloud. Adjusting the various view options in Foldit can help reveal the cloud's secrets. Several keyboard shortcuts make it easier to adjust the view. These shortcuts work on Windows and Mac:
- Toggle the Electron Density panel: shift+e
- Use alt-shift-click and drag to adjust the fog (with the mouse over the background)
- Use ctrl-shift-click and drag to adjust far visibility (with the mouse over the background)
- Use ctrl-alt-click and drag to adjust near visibility (with the mouse over the background)
- Use shift-q to focus on a segment with the mouse over the segment
- Density notes: open electron density, hover on density, tab to create dot.
- Density note text: hover and tab on existing dot to open note
- Change density note color: right click (or command-click) on an existing dot and choose color
The Electron Density panel can be displayed using the shift+e shortcut in both the original and the selection interfaces.
In the original interface, the Electron Density panel is also available via Actions -> Electron Density. In the selection interface, the Electron Density panel is available via the "Main" menu, or using the shortcut p -> Electron Density.
The "fog" and "far visibility" controls are somewhat similar. The "fog" control gradually fades the more distant part of the protein. All parts of the protein remain visible in the fog. The far visibility control causes the more distant part of the protein to disappear completely.
The "near visibility" control causes the parts of the protein near the view to disappear.
The shift-q shortcut when hovering over a segment focuses on the segment, and cuts away much of the foreground.
The "q" or "home" keyboard shortcuts reset the view options.
Getting started - BBF videos
Black Belt Folding Electron Density videos from 2013:
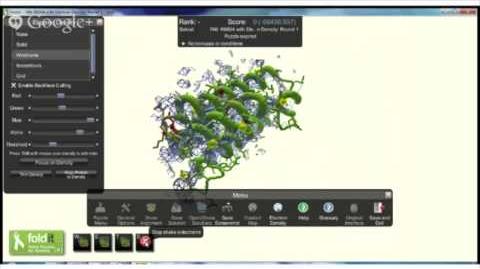 BBF Electron Density |
Susume |

Strategies
Protein crystallograpers course - Fitting page: Fitting refinement and validation
Puzzle History
For a list of Electron Density puzzles that have featured on Foldit, see the Electron Density section on the Puzzle Results page.
Exciting Electron Density Results!
More Exciting Electron Density Results!
Nature paper ! Determining crystal structures through crowdsourcing and coursework.
External Links
- wikipedia: Electron Density
- wikipedia: X-ray Crystallography
- UMass: Interactive Electron Density model (requires Java)