

Parabacteroides Distasonis. The protein, in green, starts as a straight extended chain. The guide is a the translucent grey shape.
Parabacteroides Distasonis is a beginner puzzle.
This puzzle is a "Quest to the Native" or QTTN puzzle. It's similar to the Quest to the Native Intro Puzzle.
Unlike the intro puzzle, this puzzle starts with the protein as a straight extended chain. There's also a translucent guide, which represents the "native" shape of the protein. The goal is to fit the protein to the guide.
Tools and strategies[]
A QTTN puzzle is somewhat similar to an electron density puzzle, but the guide in a QTTN puzzle clearly shows the exact shape of a protein. In contrast, it's hard to see anything in an electron density "cloud", and the cloud often doesn't cover the entire protein.
The Parabacteroides Distasonis puzzle starts the protein in an extended chain, with secondary structures assigned.
The guide makes it clear that the protein has two helixes and six long sheets. There are also two small sheets of one segment each.
When you hover over one of the sidechains of the protein, the corresponding sidechain appears on the guide. The guide sidechain disappears when you move the mouse. (Make sure you have "Show Stubs" or "Show All" selected under "View Sidechains" in the View Options menu.)
If you compare the protein to the guide, you'll see that the secondary structures don't quite match. Fixing the secondary structure assigned to the protein can help when fitting the protein to the guide.
Correct secondary structure[]
As one example of secondary structure problem, segments 67 to 69 of the protein are loop, but the corresponding section of the guide shows a sheet.
(As always, when you hover over a segment of the protein and hit the tab key, the segment information window appears, giving the segment's number, amino acid, and score.)
To add or change structure, in the original interface, select structure mode, then right-click (or control-click) on one of segments and select the desired secondary structure from the wheel menu. You can do this for each segment, or you can "paint" secondary structure by hovering over a segment with the desired secondary structure and dragging along the backbone.
In the selection interface, select the segments you want to change, then use the secondary structure icon (sheets) or the L (lowercase "l") keyboard shortcut and select the desired secondary structure type.
Once you have the secondary structure correct, it's much easier to align the protein with the guide.
Idealize secondary structure[]
One problem is that the two helixes start as straight lines. That's fine for sheets, but not so good for helixes. Fortunately, there's a shortcut to getting a coiled helix.
The idealize secondary structure tool changes a sheet or helix to its theoretically perfect shape. For helixes, that's a straight coil. For sheets, it's a flat ribbon with a slight twist, instead of a perfectly flat extended chain.
For this puzzle, good first step is to idealize the larger helix near the middle. If you've already fixed the secondary structure, that should be segments 37 through 49.
In the original interface, hover over one of the helix segments, then right-click (or control-click) and select "Idealize SS" from the wheel menu. The helix instantly becomes a perfect coil.
In the selection interface, double-click one of the helix segments to select the entire helix and adjacent loop segments. With the helix selected, use the idealize icon (paint brush with tube of paint) or the keyboard shortcut 5 idealize the helix.
You can also idealize the small helix at the beginning of the protein, (corrected) segments 2 through 8.
Idealizing the sheets may or may not help. It may be easier to leave the sheets alone until they're aligned with the guide, then experiment with idealizing them to see if it improves the fit.
Move[]
After idealizing at least the longer helix, use the move tool to move it into the guide. Keep rotating the protein about 90 degrees, up and down, right and left as you move the helix until you have a good match. Ideally, the protein should cover the guide almost completely.
Use the protein's sidechains to help determine when something's in the right spot. It's generally easiest to use the "Show Stubs" option in View Options (or using the shift+T keyboard shortcut), which makes all the sidechains look like alanine.
When you hover over one of the stubs, the full sidechain appears, both on the protein and on the guide. The sidechain on the guide should be close to the sidechain on the protein when things are in the right position.
(You won't see a stub for a glycine segment, since glycine doesn't have a sidechain. )
If the "Show sidechains with clashes or exposed" is selected in view options, some sidechains always appear in full. Turn this option off if these sidechains get in your way. You may also want to turn off "Show Clashes", "Show Exposeds", and "Show Voids" at the same time.
The hovering method also works if you have "Show All" selected for sidechains, but it may be more difficult to work with this cluttered view.
Cut and move[]
Once you have one helix lined up, the next step is to start positioning the other sheets and helixes.
One way to do this is to insert cutpoints in the loop sections between the sheets and helixes. Once a section has been cut out this way, you can use the move tool to position it without affecting the rest of the protein.
Again, use "Show Stubs", and hover over the stubs on the section you're moving to make sure you're going to the right spot.
Closing cuts[]
At some point, you'll need to close the cuts between the sheets and helixes. You can do this as you align each section to the guide, or wait until the end.
In the original interface, you can close a cut by freezing the sheet or helix on each side of the cut, then wiggling the loop sections on either side of the cut. Select both freeze and wiggle by hovering over the correct section of the protein, then right-clicking (or control-clicking) to display the wheel menu.
In the selection interface, select the loop segments containing a cut by clicking on one end of the loop, then shift-clicking on the other end. With the loop segments selected, wiggle to move the ends of the cut together.
When a cut is blue, the ends are too far apart. When a cut is turns yellow, clicking on the cut will close it.
Tricky bits[]

The twisted sheet is a folding challenge.
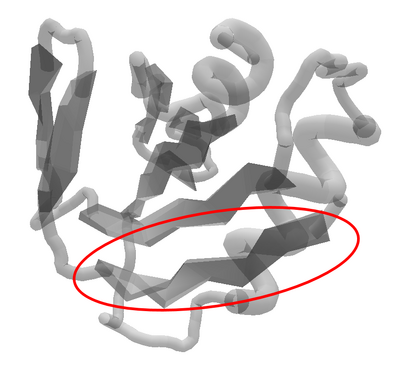
Toward the end of the protein, there's a major mismatch with the guide. The guide shows a sheet with a sharp bend for segments 77 through 82, but the protein starts with only segment 77 as sheet.
A first step is to make segments 77 through 82 a sheet, as described above.
To create the bend, one possibility to add multiple cuts within the sheet, aligning a sidechain or two at a time. This can get you close the shape, but the resulting sheet will probably be very strange-looking, and won't score well.
Another possibility is to align the crooked sheet as well as you can, then add bands to try and draw it into the correct shape. Banding is discussed in detail below.
Banding[]
Once you have the protein matched to the guide, add bands to help refine the shape.
One strategy is to add a band from the first "nub" of each sidechain to the corresponding spot on the guide. If you have "Show Stubs" selected, just start the band at the end of the stub. The corresponding sidechain on the guide appears when you start the band.
When drawing a band to the guide, hold down the alt key. This helps keep the end of the band from attaching the protein.
It's often difficult to get the end of the band exactly where you want it. You'll need to rotate the protein multiple times, up and down, right and left, to get the band to the right spot.
You may find it easiest to start with a short band. Once the band is started, release it, then drag the round end of the band toward the right spot on the guide. Releasing the band frequently lets you use undo (control+Z) if the band accidentally sticks to the protein.
Bands between the protein and the guide are known as spacebands, because one end of the band is a point in space.
You can also add segment-to-segment bands to help stabilize the protein, for example, between adjacent sheets. Also, you can add additional sidechain bands, which may help get the larger sidechains into position.
Once you have the protein banded, make a manual save using control+S, then shake and wiggle the protein. You may also want to try wiggling each secondary structure on its own before wiggling the entire protein.
Refining[]
After some shaking and wiggling, a "fuse" (or "fuze") recipe like Rav3n_pl Fuzes v1.5.1 can help the band segments move to their desired positions.
As always a rebuild recipe like EDRW -- Tvdl enhanced DRW 3.0.1 -- can help find better shapes for the protein. EDRW is best as long-running recipe. It's a good choice if you can leave your computer running overnight.
Technical stuff[]
The protein in this puzzle is available in the Protein Data Bank as id 4JM1.
There's some theory to banding the end of the sidechain stubs.
The end the stub, also known as the first "nub" of the sidechain, is actually the atom called the "beta carbon", which is always the first atom of the sidechain. For alanine, the beta carbon is the entire sidechain. Other amino acids have addtional atoms in their sidechains. (And, of course, glycine has no sidechain, just a hydrogen atom in place of the beta carbon.)
Banding the beta carbon is considered a good technique because it allows both the backbone and the rest of the sidechain to move when you wiggle the protein.
There's also an "alpha carbon" in the backbone. Adding a band between two segments of the backbone in effect bands the alpha carbons.
")
")
")